
Hot water in your house is not a miracle, but it comes from the heater. This element is a must in every household, and you can choose between the tank and tankless models. On this page, you can learn about the differences between these devices. If you’ve ever wanted to try DIY hot water tank repair and replacement, you may be wondering if you’re up to the task. These projects can seem discouraging to new DIYers, but heater repair is not mission impossible. You just have to find the breakdown source – a thermostat, heating element, a damaged tank, or leaky valve.
Water heater parts are not expensive for hot water tank repair, and most of them are easy to replace and fix. But if breakdowns frequently happen soon after replacing some parts, it’s time to consider buying a new unit. In that case, you can do a DIY installation, too.
Table of Contents
Power Off
First things first, you have to kill the unit before doing anything with it. So turn off the power to your heater at the breaker box. If you don’t have a breaker box, you can turn it off at the main switch. That will ensure safe work. Also, you have to wear gloves and rubber-sole footwear, as these can be lifesavers in case of electrical shock.
Once you’re sure that the power is off, you can open the heater’s tank. The first step is to remove the metal cover. You can see the insulation and thermostat. There’s no need to remove these if you only want to drain the water heater. But it will be necessary if you have to replace a heating element or thermostat.
Drainage Is a Must
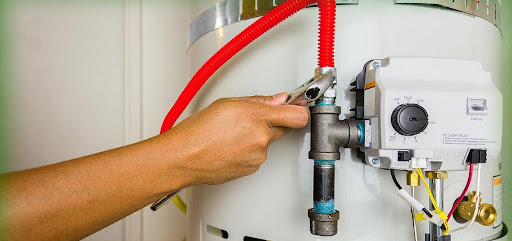
Models with tanks store certain amounts of water to deliver it warmed up anytime. On this page, see how these heaters differ from tankless models. Once you shut off the unit with a storage tank, you need to drain it. Occasional drainage is desirable, as there can be buildups inside the tank that disturb water flow.
The drain valve is usually located near the bottom of the tank, right next to the thermostat control knob. Place a hose on the bottom of the tank and turn on a nearby hot water faucet. That should ease the pressure and speed up drainage.
You’ll need to refill the tank with cold water as well. Close the drain valve and turn on the cold water valve. That will flush excess sediments from the tank. Repeat the procedure as many times as necessary or until all scale deposits are flushed. Finally, fill up the tank and restart the heater. Flushing should solve the problem if it only was about residues inside the tank.
Check Thermostat
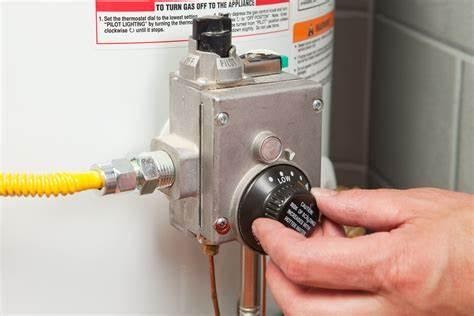
As with a heating element, you must check if the thermostat is the problem. Use a multimeter to test it out (some water heaters have two thermostats, so check each of them). Ensure voltage is coming to the thermostat and test it for power supply. If the multimeter shows no power, you find the breakdown source.
When replacing the thermostat, shut off the water heater before fixing anything. Next, move the safety cover and insulation. Make sure to test the power supply after that, too. Better safe than sorry. Make a simple sketch of wiring to be sure how to rewire it later.
Gently remove brackets that hold the thermostat inside the tank. Take out the old one to the store to find the best replacement for it. Buy new brackets if they get damaged. Put a new thermostat in place of the old one and do the rewiring. Put everything back and turn the unit on. Leave it for a few hours before testing the hot water supply.
Replace Heating Element
If you notice that your hot water is not as hot as it should be, you may need to replace the heating element. Gas and electric models both have this component. Depending on your unit type, it can become damaged if it’s not serviced regularly. Luckily, the replacement is super-easy, and you need just some essential tools and a new replacement part.
Start with testing the resistance of a heating element. If the tester doesn’t blink, it’s time to replace this part. You will need a new heating element for a few tens of dollars and a wrench from a home center or hardware store for around $5.
Tips on testing the elements are listed below:
https://homeguides.sfgate.com/test-water-heater-element-multimeter-39550.html
Remove the old heating element by using this tool and pulling it straight out. Install the new part into the opening and tighten it. Reconnect the wires and put back the insulation layer before covering the opening. Refill the tank and reinstall the unit.
Time for Unit Replacement
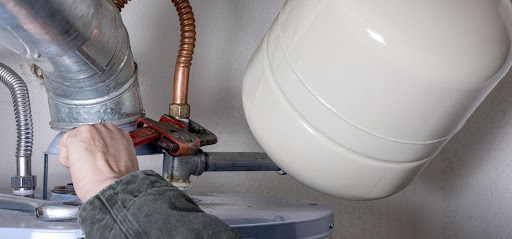
A water heater should be replaced whenever it shows signs of degradation and its performance becomes unsatisfactory. Or simply when it’s older than 10 years, even if it still works. That way, you’ll prevent costly and useless repairs.
If your heating unit is leaking, check its fittings first. If they are loose, tighten them up. Yet, if the leaks are coming out directly from the tank, it’s time to replace the entire unit. Keeping track of these symptoms can help you decide whether or not to replace your water heater. That will ensure better energy efficiency and lower bills.
Sediment buildups inside the unit can be removed with regular drainage. But if you notice your water is cloudy or sand-like most of the time, it’s time to replace the heater. These deposits can lead to cracks and leaks, so you may end up with gallons of water on the floor and invasive mould everywhere.
Hot water tank repair is not a hard task, as most parts are easy to replace. But these are cases when replacement is a much better and cost-effective option. Don’t think twice if you have ongoing breakdowns and lack of hot water. A broken unit can affect your monthly bills and be a safety risk for you and your loved ones.