
The Internet becomes one of the important sources of knowing new things, searching for required information, etc. If we search for like any information internet, we will type that particular name and instantly get the result. Importantly, when we get our desired outcome, we want to store those for further use. Here, the user sometimes falls into a problem like can’t download correctly or save those particular items. So, many snipping tools are developed to get rid of such mentioned issues. And, through those tools, the user can easily capture his required photo. Today, we are going to discuss the snipping tool for mac, and hopefully, you can benefit from here.
Table of Contents
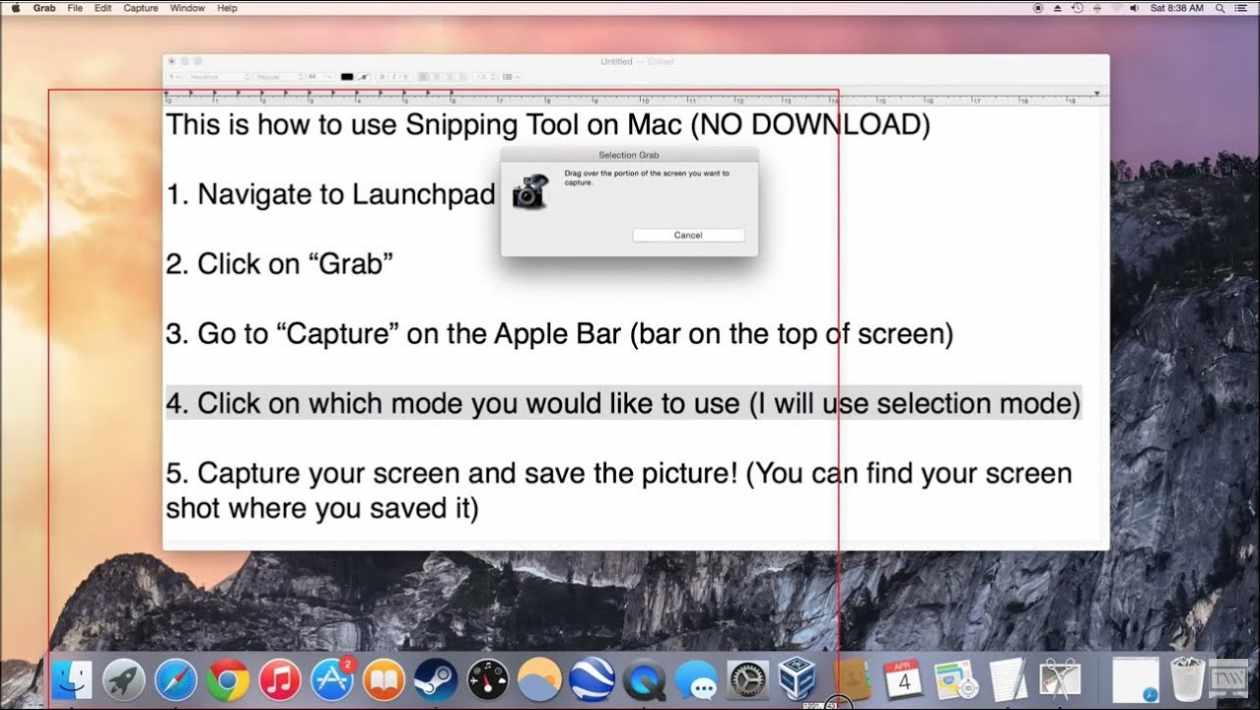
The Process of snipping tool for mac
There are some free methods that help to capture a screenshot of your required information on Mac. So, here we enlist some free methods that you can apply without using any free or paid tools.
1st method: You need to press (CMD + SHIFT + 3), and this step will help to capture a full-screen screenshot
2nd method: If you want to capture a selected area as a screenshot, you need to press CMD + SHIFT + 4.
3rd method: This process will help you to capture only an active chosen window. So, to do that, you need to press CMD + SHIFT + 5.
However, if you need a screenshot of a window or menu, you need to press (Shift + Command + 4 + Space bar).
6 Best Snipping Tool for Mac
A snipping tool is a great tool that helps to capture whatever the user wants from a computer screen. Here we enlist some reasons that can be done through the snipping tool.
- This tool helps to make visual tutorials
- You can share your screen with friends
- You can send screenshots for work
- Snipping tools help to keep a record of important documents that a user cannot download.
So, if you are eager to get the best snipping tool for mac, let’s check out our discussion below.
-
Snagit
Our first choice is Snagit screen capture software, and it is very much popular among corporate customers. Besides, Snagit screen capture software comes with powerful features and aesthetic interface. Therefore, the user will get a blissful experience during editing and screen recording sessions. Whenever the user opens to use it, he will see a small control panel that lies at the top of the screen. This control panel lets the user change settings, customize hotkeys, and capture screenshots. Moreover, here lies the editor features nifty tools such as arrows, blur, callouts, and so on. In addition, this tool allows for creating videos straight and animated gifs from the app.
Furthermore, Snagit offers three ways to capture your screens, such as:
- Capture the entire screen.
- A specific region
- A specific application.
Moreover, this tool allows you to get images from cameras and scanners. Interestingly, Snagit allows the user to capture text from a picture and then paste it into the text editor. Sad to say, all the features are not free instead; you need to pay $50 for all features. Since the charge is higher than others, the features are pretty and easy to use. However one con is the video editing is cumbersome through this app.
-
Lightshot
Technology comes to make our life simple, as well as easy. Besides, life becomes comfortable with many sophisticated tools and software. Whenever we look for any tools or software to use, we seek easy to use amenities at first. Likewise, if you are looking for a snipping tool that offers an easy-to-use mechanism, Lightshot is such a tool. If you want to take a screenshot, you need to press the print screen button from the keyboard => select the area. Moreover, this tool allows you to edit the screenshots by adding color, shapes, text, etc. Interestingly, this tool makes some tasks like capture, save, and upload easy for the user. Besides, if you take one shot, you don’t need to wait for a long time to take another shot. Also, you can use the Lightshot tool without spending anything and allow you to do:
- Print your captured screenshots
- Upload images to Prntscr.com
- Search for a similar picture on the internet
- Copy and save
Nevertheless, if you look for the cons of this app, then you will find the following things:
- This app does not have capture modes.
- You can’t find a separate editing screen with advanced tools.
-
SbapNDrag
Here is another snipping tool that helps capture a full screen, a window, or a specific section. SbapNDrag offers both free and paid versions and the paid or pro charge $10. So, if you get the pro version, you can assign global hotkeys, turn off adverts and resize images. Beyond those, you will get some additional features from the pro version like:
- A library for our screenshots
- You will find the option to share your captured screenshot to Facebook, Twitter, email, and so on.
- You can annotate your captured screenshots without losing the original format.
- Here lie multiple output formats like JPEG, TIEF, or PNG.
- You will find border and scaling, batch rename.
- You will find a custom keyboard shortcut.
-
Monosnap
Here we bring another snipping tool for mac that has more than 1 million users worldwide. Monosnap is that service provider, and through it, users can grab the entire screen and a specific portion. After capturing the screenshot, the user can use built-in editing tools to edit and share with others. Moreover, this tool also works on Chrome and Windows. Beyond those, now let’s see the additional features of Monosnap below.
- You can grab the pixel-perfect screenshots.
- You will find customizable hotkeys.
- This tool allows you to highlight important information and blur the sensitive data.
- With this tool, you can record videos or GIFs.
- You can use Monosnap Cloud Storage or the other storage services.
However, as the cons, you may face ads while upgrading this tool.
-
Greenshot
Greenshot is another renowned screen capture service provider for Mac. Here include several beneficial features such as:
- Hotkey combination.
- Can copy the images to the clipboard then send it directly to a cloud-based program like Dropbox, Confluence, etc.
- If you have any sensitive information, this tool helps to blur that area.
- This tool allows you to customize some default settings.
- You can use your own hotkey combination to get better functionality.
-
Skitch
If you are looking for a free snipping tool for Mac, Skitch will be your perfect choice. Moreover, the user can take a screenshot, edit it, and then share it with their friends and others. By the way, Evernote designs this tool. Interestingly, the user can quickly and simply use this tool because of its interface. Here the user will find seven tools in its mark-up function like:
| Text | Shapes | A pixelater for blurring | A highlighter | |
| Arrows | A color palette with eight colors | Cropping tools | ||
Many functions from the Skitch are free. But if you want to markup PDFs save files to Evernote, you need a premium account. Particularly, PDF markups are a useful feature, mainly used for conversations with clients and business emails. Interestingly, with this feature, the user can easily highlight the critical area. However, the mentioned premium account will charge you $7.99/month. After getting this premium account, it will integrate with Outlook, Gmail, Google Drive, Salesforce, Microsoft Team, and slack. However, one drawback you may face like this tool doesn’t allow you to save a note while quitting the app.
FAQ of snipping tool for mac
How do I snip on a Mac?
There is some free method that helps to capture a screenshot of your required information on Mac. So, here we enlist some free methods that you can apply without using any free or paid tools.
- 1st method: You need to press (CMD + SHIFT + 3), and this step will help to capture a full-screen screenshot
- 2nd method: If you want to grab a selected area as a screenshot, you need to press CMD + SHIFT + 4.
- 3rd method: This process will help you to capture only an active chosen window. So, to do that, you need to press CMD + SHIFT + 5.
However, if you need a screenshot of a window or menu, you need to press (Shift + Command + 4 + Space bar).
Also, you can use tools to grab a screenshot on your Mac device, apart from those free methods.
How do I snip a screenshot on a Mac?
There is some free method that helps to capture a screenshot of your required information on Mac. Here we enlist some free methods that you can apply without using any free or paid tools.
- 1st method: You need to press (CMD + SHIFT + 3), and this step will help to capture a full-screen screenshot
- 2nd method: If you want to grab a selected area as a screenshot, you need to press CMD + SHIFT + 4.
- 3rd method: This process will help you to capture only an active chosen window. So, to do that, you need to press CMD + SHIFT + 5.
However, if you need a screenshot of a window or menu, you need to press (Shift + Command + 4 + Space bar).
Also, you can use tools to grab a screenshot on your Mac device, apart from those free methods.
How do I snip an image?
There is some free method that helps to capture a screenshot of your required information on Mac. Here we enlist some free methods that you can apply easily to snip an image.
- 1st method: You need to press (CMD + SHIFT + 3), and this step will help to capture a full-screen screenshot
- 2nd method: If you want to grab a selected area as a screenshot, you need to press CMD + SHIFT + 4.
- 3rd method: This process will help you to capture only an active chosen window. So, to do that, you need to press CMD + SHIFT + 5.
However, if you need a screenshot of a window or menu, you need to press (Shift + Command + 4 + Space bar).
Here are some free tools that have blissful features to grab a screenshot
- Snagit
- Lightshot
- SbapNDrag
- Monosnap
- Greenshot
- Skitch
How do you copy and paste a snip on a Mac?
If you want to copy and then paste a snip on Mac, you need to follow the following process.
- To begin with, you need to hold down (Command+ Shift + 4). After that, you could see the screenshot selection tool.
- Secondly, hold down the Control button =>select your required area on the screen using the mouse.
- Finally, you need to pull up the document that you want to paste the selection into => press Command + V.
What is a good Snipping Tool?
You may use the internet to acquire knowledge or collect the required information. Whenever you gather information, sometimes you may fall into a problem due to no save option. Here a snipping tool is a great tool that helps capture whatever you want from a computer screen. Moreover, some free tools have blissful features to grab a screenshot. So, if you are eager to get the best snipping tool, let’s check out our discussion below.
- Snagit
- Lightshot
- SbapNDrag
- Monosnap
- Greenshot
- Skitch
Final Thought of snipping tool for mac
Here we finish all our discussion on the snipping tool for mac, and hopefully, you can get our tone. However, if you have any queries on our discussion, you are welcome to ask in our comment section.
Frequently Asked Questions
Q1: How do I take a screenshot on a Mac?
Ans: To take a screenshot on a Mac, you can use the built-in screenshot utility called Grab. You can find Grab in the Utilities folder within the Applications folder. Alternatively, you can use keyboard shortcuts. Press Shift + Command + 3 to capture the entire screen, or Shift + Command + 4 to capture a selected portion of the screen. The screenshots will be saved as image files on your desktop.
Q2: Can I annotate or edit screenshots on a Mac?
Ans: Yes, you can annotate and edit screenshots on a Mac. After taking a screenshot, it will appear as a thumbnail in the bottom-right corner of the screen. Click on the thumbnail to open it in the Markup tool. The Markup tool allows you to add text, shapes, drawings, arrows, and other annotations to your screenshots. You can also crop or rotate the image if needed.
Q3: How do I take a snip of a specific area on a Mac?
Ans: To take a snip of a specific area on a Mac, you can use the built-in snipping tool called Screenshot. Press Shift + Command + 4 on your keyboard. Your cursor will change to a crosshair. Click and drag the crosshair to select the desired area to snip. When you release the mouse button, the snipped image will be saved as a file on your desktop.
Q4: Where can I find the snipped images on my Mac?
Ans: The snipped images taken on a Mac are saved as files on your desktop by default. After you snip an area, a file will be created with the name “Screen Shot” followed by the date and time of the snip. You can also change the default save location for screenshots by going to System Preferences > Keyboard > Shortcuts > Screenshots.
Q5: Can I take a snip of a specific window on a Mac?
Ans: Yes, you can take a snip of a specific window on a Mac. Press Shift + Command + 4 on your keyboard, then press the Spacebar. Your cursor will change to a camera icon. Move the camera icon over the window you want to snip, and it will be highlighted. Click on the highlighted window to take the snip. The snipped image will be saved as a file on your desktop.