
Solar energy is a renewable energy source that offers the environment and those using it several benefits. While it may seem like an expensive venture upfront, in the long run, having solar panels installed in your home will help you save a lot of money on energy use.
In this blog post, we will explain the steps involved with the installation of solar panels. But first, let’s talk about where these panels can be installed.
Table of Contents
Where Should You Install Your Solar Panels
Stand-alone buildings, building tops, and rooftops are where these panels are often installed. But just doing the installation on any of these isn’t enough. You must ensure that they are placed in a location with adequate direct sunlight.
So, one thing to do before installation is to make sure that everything that will obstruct sunlight to the solar unit is removed. Take time to trace the sun’s path and ensure it is not blocked by any object that will shadow over the unit. If you don’t do this and a shadow is cast over the unit, its operating efficiency most likely will be affected.
What to Do Before the Installation
Before the installation commences, several things have to be considered to ensure everything goes on smoothly. The following are some important things to be done before the installation:
1. Cost Calculation
You need to be sure of the cost of setting the system up based on its size and type. Some countries often subsidize the cost of solar unit installation to encourage the use of this renewable energy. So, you could find out if your country offers this and use it to your advantage.
2. Determine the System Size
Next, you have to figure out the required system size based on the appliances that will be used. Do this by calculating the wattage of the appliances and then calculating the hours these appliances will operate daily. The result you get will then be used to determine the unit size that will carry the calculated load effectively.
If this measurement isn’t done, the right battery and wire size may not be used. The right wire size is needed to ensure overheating is prevented and power is adequately transferred to and from the batteries.
3. Ensure All Required Equipment Is Gotten
Make a checklist of all the system gears needed such as the battery, power inverter, charge controller, and panels to ensure none is overlooked.
Solar Panels Installation Process
Whether the solar unit is being installed for home or commercial use, it has to be installed on an elevated platform (like rooftops) where the unit can get direct contact with sunlight.
To achieve this, the following installation procedures are usually followed:
Step 1 – Installing the Mount
The 1st step to take when installing solar units is to install the mounts which typically are used to support the panels. The type of mount used is often based on the requirements. There are three types of mounts namely:
- Flush mount
- Roof-ground mount
- Pole mount
When installing the mounts, the direction the panels should face should be considered. For most Northern Hemisphere countries, the south is the ideal direction solar units should face, whereas, the north is more ideal for Southern Hemisphere countries. Visit https://www.sciencedirect.com/ to learn more about the Northern Hemisphere.
Also, the mount has to be tilted slightly; the tilt’s angle should typically be between eighteen and thirty-six degrees.
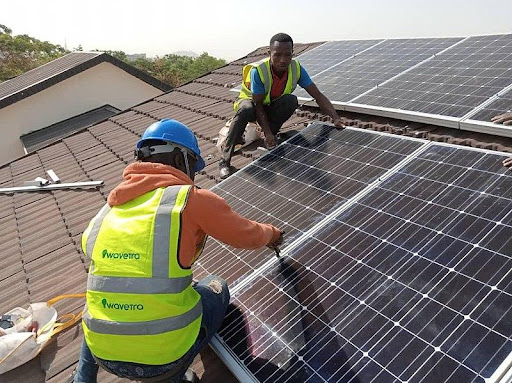
Step 2 – Solar Panels Installation
Once the mount is ready, the panels have to be fixed to the structure. Fixing the panels to the mount simply requires bolts and nuts which you will need to tighten as tight as possible to ensure the panels are secured properly to the structure.
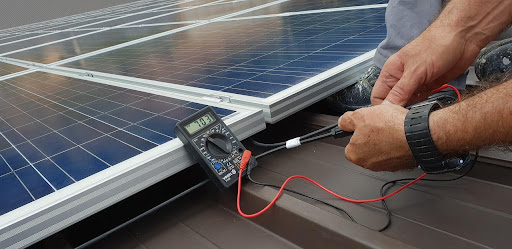
Step 3 – Electrical Wiring
For the wiring aspect, universal connectors such as MC4 are typically used. This is because connectors like these can be used for every solar panel.
Parallel and series connections are usually used for the wiring.
Series Connection: With this type of wiring, one photovoltaic module positive (+) wire will be connected to another module negative (-) wire. Series connections usually increase the match of the voltage with the unit’s battery bank.
Parallel connection: Parallel connection on the other hand involves negative to negative and positive to positive connections. With this wiring, each panel voltage stays equal.
Step 4 – Connecting the Solar Inverter to the System Panel
The 4th step involves connecting the solar inverter to the system. This is done by connecting the solar panel’s positive wire to the inverter’s positive terminal and connecting the panel’s negative wire to the inverter’s negative terminal.
After this is done, the inverter will then be connected to both the grid input and the unit’s battery so that electricity can be produced.
Step 5 – Connecting Solar Battery and Solar Inverter
After the panel and inverter have been successfully connected, the battery and inverter have to be connected as well. Just like with the panel, the battery’s positive terminal is connected to the inverter’s positive terminal. While the negative terminal of both the battery and inverter is connected.
Off-grid systems often require a battery bank because they aren’t connected to a grid where they can store power for later use. In this case, extra power is stored in the battery and used as a backup in cases where the panels can be charged by sunlight.
Step 6 – Connecting Grid to the Inverter
Finally, the last connection to be done is connecting the grid and the inverter. A regular plug will be connected to the building’s power switchboard. Then, an output wire will be connected to the electric board used to supply power to the building.
Step 7 – Starting the Inverter
Once all the connections and wirings are completed, turn the building’s main switch ON so that the inverter comes on.
Conclusion
Solar energy is a great form of renewable energy that can be used either in residential or commercial buildings. There are 7 main steps involved in the installation of these units, all of which have been discussed in this article.